Warning, /pfRICH/Visualization/README.md is written in an unsupported language. File is not indexed.
0001 # Detector and event visualization
0002
0003 | **Table of Contents** | |
0004 |--------------------------------------------------:|-------------------------------------------------------------------------|
0005 | [Prerequisites](#Prerequisites) | Prerequisites needed for the macros |
0006 | [Configuration xml file](#Configuration_xml_file) | How to create xml file defining colors and transparency of the detector |
0007 | [Recoloring](#Recoloring) | How to recolor the detector model using configuration xml file |
0008 | [Detector visualization](#Detector_visualization) | How to visualize the recolored detector |
0009 | [Event visualization](#Event_visualization) | How to visualize particles in the recolored detector using a particle gun |
0010 ## Prerequisites
0011 - TGeo geometry ROOT file - see https://github.com/eic/drich-dev for instructions on how to generate the geometry file (geometry.sh macro).
0012 - Particle gun - see tutorial by Shyam Kumar https://indico.bnl.gov/event/18360/. (Visualize_DD4HEP/Eve_Gun/run_eve.sh)
0013
0014
0015 ## Configuration_xml_file
0016 If you want to create a new xml file including the information about the colors and transparency of the particular detectors and subdetectors, you can use the following macro:
0017 `Create_xml.C` in the terminal:
0018 ```bash
0019 root -l Create_xml.C"(\"detector_geometry.root\")"
0020 ```
0021 This will create a new xml file called `detector_geometry.xml`. The example of the xml file is shown below:
0022 ```
0023 <config>
0024 <detector name="PFRICH">
0025 <part name="GasVolume" color="20" transparency="0" />
0026 <part name="InnerWall" color="20" transparency="0" />
0027 ...
0028 </detector>
0029 </config>
0030 ```
0031
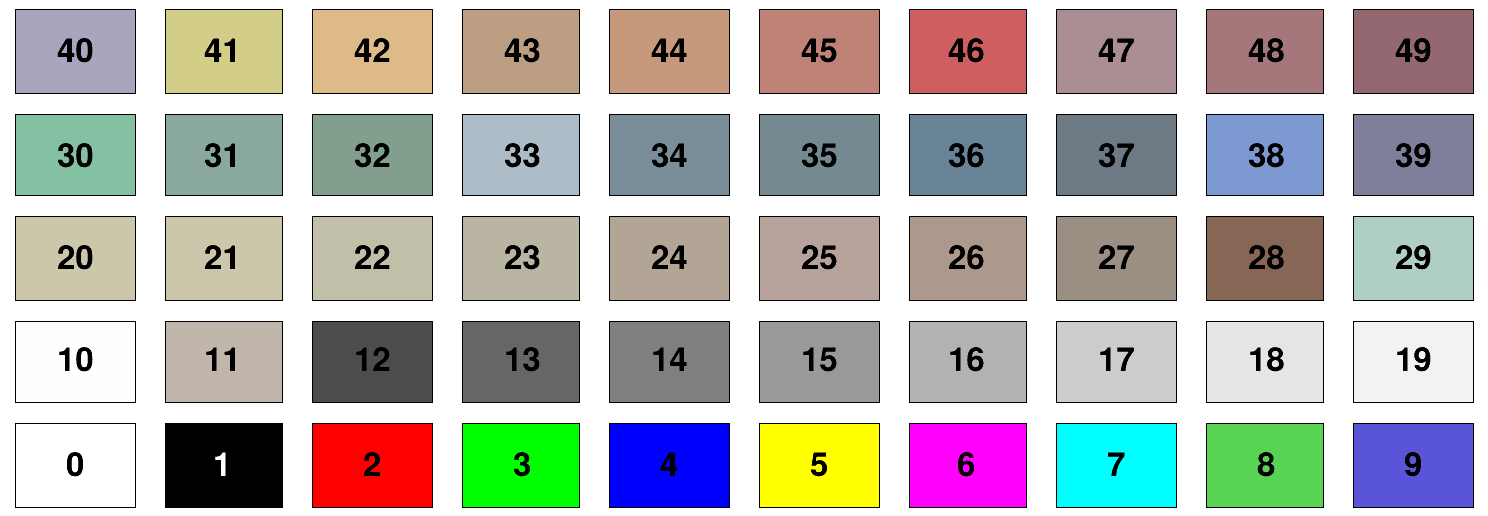
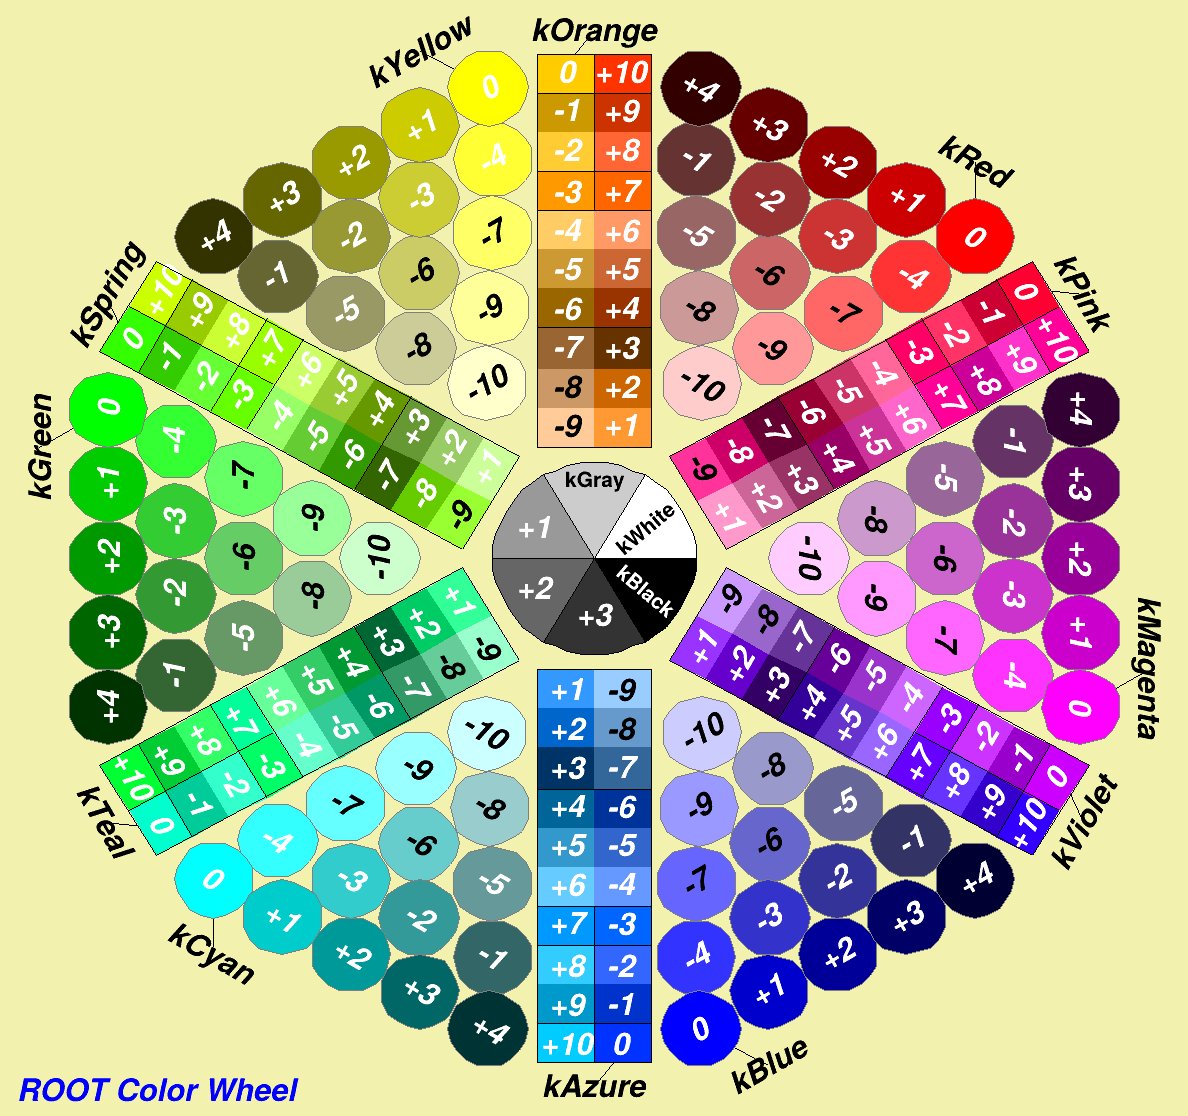
0032 By default, the color is set to 20 and transparency to 0. The colors have a typical ROOT format, see the table and the color wheel below.
0033 
0034
0035 
0036
0037 The transparency is between 0 and 100, where 0 is fully opaque and 100 is fully transparent.
0038 ## Recoloring
0039 If you want to recolor the detector using xml file `detector_geometry.xml`, you can use the following macro:
0040 ```bash
0041 root -l Recoloring.C\(\"detector_geometry.root\",\"detector_colors.xml\",\"Recolored_detector.root\"\)
0042 ```
0043 where `detector_geometry.root` is the geometry file and `Recolored_detector.root` is the new geometry file with the recolored detector.
0044 - If color is defined improperly, the kWhite color is chosen.
0045 - If transparency is set to 100, the particular part of the detector is not visualized.
0046 - If xml file does not include the subdetector, the color is unchanged.
0047 - If the xml file includes the subdetector not included in the geometry file, the macro will ignore it.
0048
0049 ## Detector_visualization
0050 If you want to visualize the detector saved as `Recolored_detector.root`, you can use the following macro:
0051 ```bash
0052 root -l Draw_model.C
0053 ```
0054 If clipping is needed, you have two options:
0055 - plane cut
0056 - box cut
0057
0058 The plane cut can be set in the macro `Draw_model.C` by adding the following line:
0059 ```bash
0060 //Ax+By+CZ+D = 0
0061 double data[4] = {1.0, 0.0, 0.0, 0.0};
0062 TGLViewer *viewer = gEve->GetDefaultGLViewer();
0063 viewer->GetClipSet()->SetClipType(TGLClip::EType(1));
0064 viewer->GetClipSet()->SetClipState(TGLClip::EType(1),data);
0065 viewer->DoDraw();
0066 ```
0067 However, it is easier to set plane or box cut in GLViewer. There the camera position can be set as well. The camera position and angle can be changed as well.
0068 To save a picture, you can use the following command:
0069 ```bash
0070 gEve->GetDefaultGLViewer()->SavePicture("output.png");
0071 ```
0072 directly in the terminal. The available formats are gif, gif+, jpg, png, eps, and pdf.
0073
0074 ## Event_visualization
0075 To visualize the event, you need to run the particle gun first. See the tutorial by Shyam Kumar https://indico.bnl.gov/event/18360/.
0076 In the folder `Visualize_DD4HEP/Eve_Gun/` you can find the macro `run_eve.sh`. Or run directly in the terminal:
0077 ```bash
0078 npsim --runType vis \
0079 --macroFile myvis.mac \
0080 --compactFile $DETECTOR_PATH/epic_tracking_only.xml \
0081 --enableGun --gun.particle pi+ --gun.momentumMin 0.1*GeV
0082 --gun.momentumMax 10.*GeV \
0083 --gun.thetaMin 3*deg --gun.thetaMax 177*deg
0084 --gun.distribution uniform --outputFile sim.edm4hep.root
0085 ```
0086 where `myvis.mac` is the macro for visualization. After that, you will get the file `sim.edm4hep.root` that can be visualized using the macro `Draw_event.C`:
0087 ```bash
0088 Draw_event.C\(true\)
0089 ```
0090 In this case, it is better to visualize the needed detectors with suitable transparency. Clipping does not work properly.

